POS IN CLOUD for iPad is a Point Of Sales client for iPad series with 1024x768 resolution.
User needs to have an account to setup the App. To create an account please visit
portal.posincloud.com which is also the portal site to manage your stores. For more detail information you can visit
here.
For the first time installation, the App will take less than 1 minutes to load the sample store data into local machine, once data fully loaded, a welcome screen will display how to start to use the program on the dashboard screen.
You can swipe the screen or touch the specified buttons to switch to different function screen, always remember to click at the LOGO icon to bring out the help screen.
To switch from Sample store to your own store which you created on the portal just click at "Settings" then choose "System" Tab and click at "Switch Store" button right beside the store name field.
You will be requested to enter the token code of your store, when finish click at "Sign In", if everything OK, your store will be imported within 2 to 5 minutes.
If you set your "request login" settings on portal as "Yes", then you will need to enter the password on the dashboard login screen, the default password is "1234" if you did not set up the settings on portal. Click at the "head" icon to login after entering the password.
you will be able to use the POS after you success log in
click at the "gear" icon to get into settings screen, choose the "System" section to change the language you want to use, click at "update" button on top right hand side to update.-
To manage Tables
To Manage orders -
Order entry -
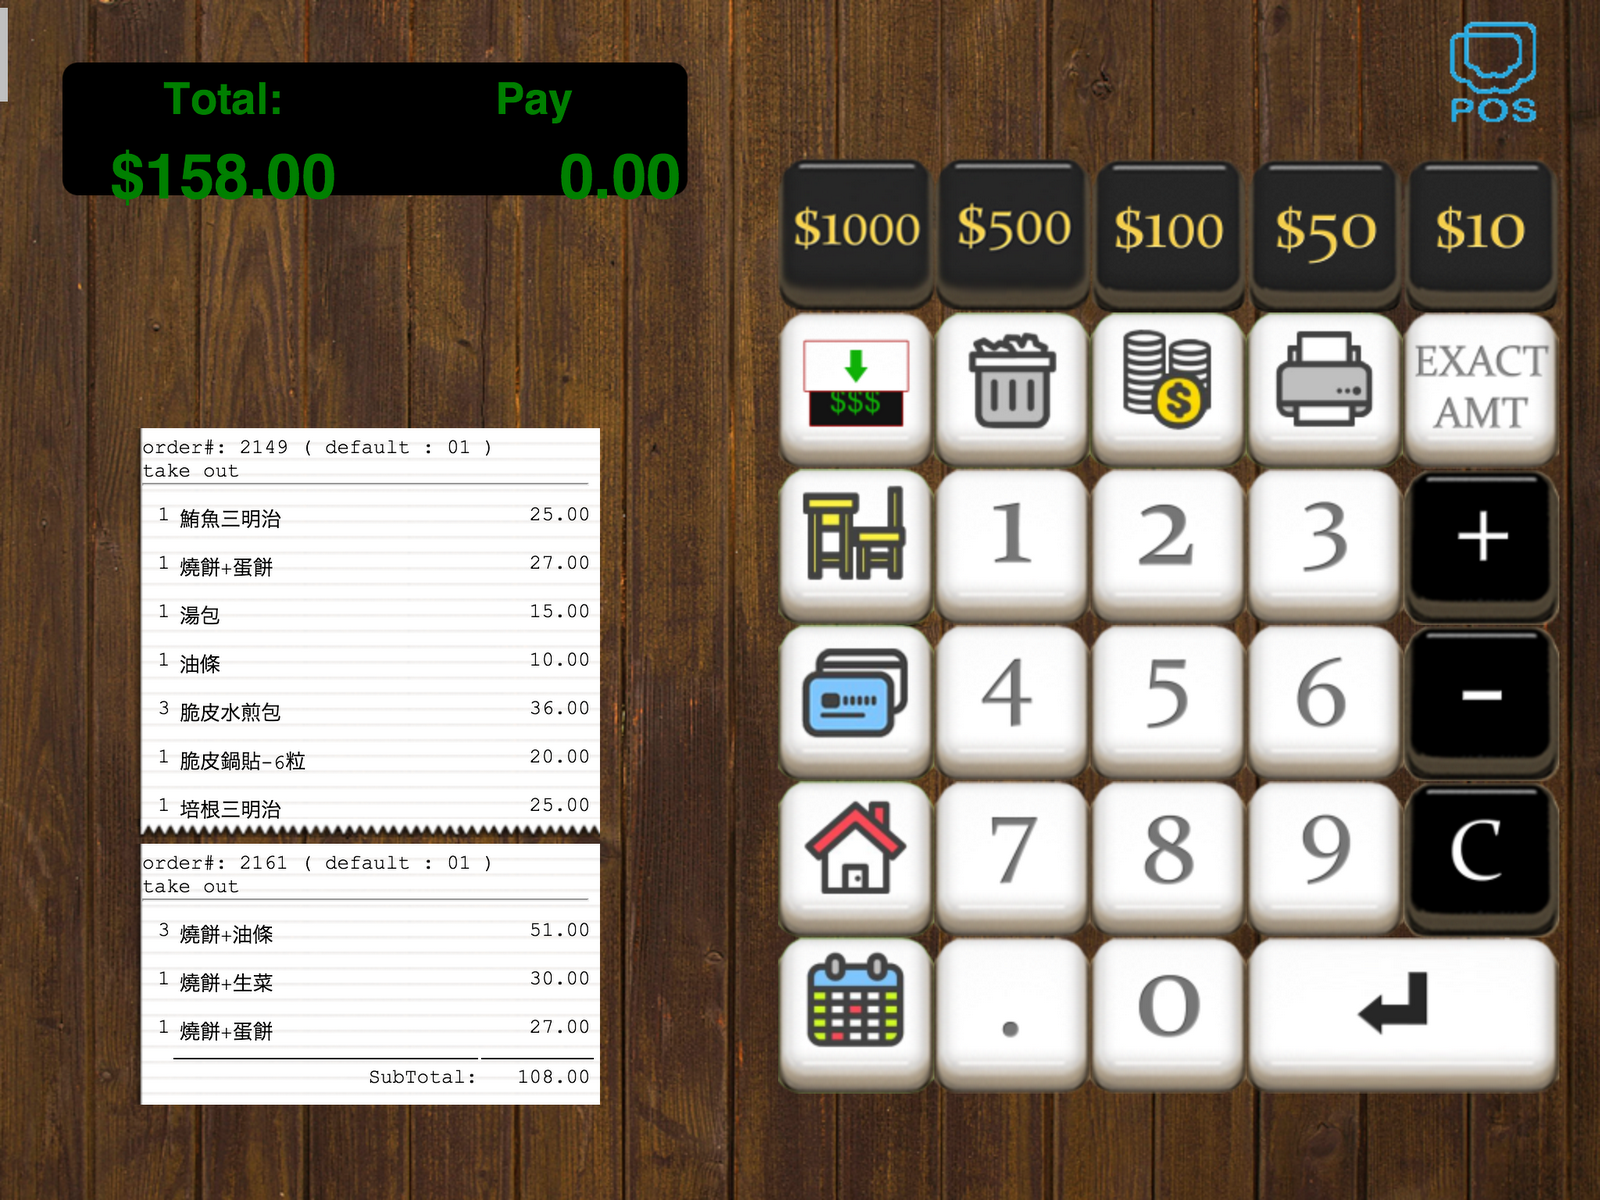
Payment screen -
To edit menu items -
To edit item options -
To connect the iPad to your online store you will need to go to the Settings screen and choose "System" tab, click at "switch store" button right beside the database name (default is "sample") then a setup screen will ask for the activation code which you should automatically receive when you register with POS IN CLOUD.
after entering the code, if the code is correct, a pop-up will ask you to select the store you want to install on the machine